How to Panel a Wall: DIY Wall Panelling in 8 Simple Steps
Wall panelling is a fantastic way to elevate your home’s interior, adding texture, warmth, and personality to any room. Whether you’re dreaming of wood panelling for walls in your bedroom, a modern panelled wall in your hallway, or a rustic wooden panel wall in your dining room, this DIY project is easier than you might think. In this guide, we’ll break down the process into 8 simple steps, ensuring you can create stunning wall panelling panels with confidence. Inspired by expert tips from top sources and enriched with unique insights, we’ll help you bring your vision to life. Let’s dive in!
Understanding Wall Panelling: Why Choose Panels for Walls?
Wall panelling has surged in popularity as a versatile and stylish interior design choice. From bedroom panelling to hallway wall panelling, this technique transforms plain surfaces into eye-catching features. But what exactly is wall panelling, and why should you consider it for your next DIY project?
What Is Wall Panelling?
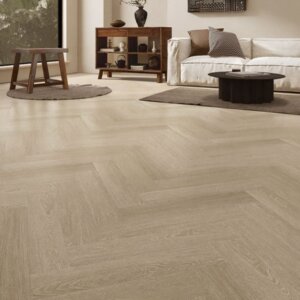
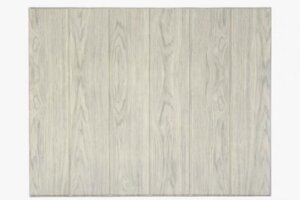
Wall panelling, often referred to as panelling walls or paneling, involves covering a wall with decorative panels made from materials like wood, MDF, or WPC (wood-plastic composite). Historically, panelling protected walls from wear, but today, it’s a go-to for adding aesthetic appeal. Styles range from classic wood panelling for interior walls to modern square panelling, offering endless wall panelling ideas to suit any taste.
Benefits of Panelling a Wall
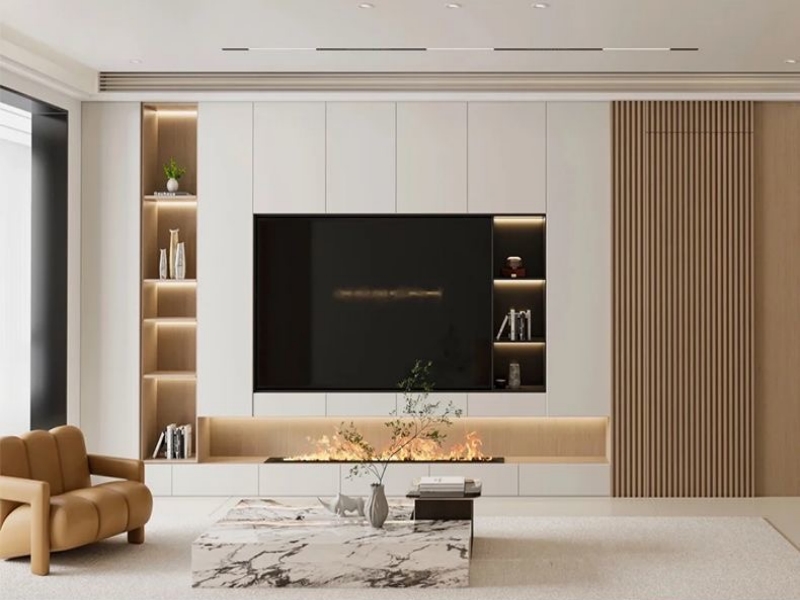
- Visual Impact: Wood panels for walls or decorative wall wood panels create depth and character, making spaces feel cozier or more sophisticated.
- Durability: Panels shield walls from scuffs and dents, ideal for high-traffic areas like panelling for halls.
- Insulation: Wooden walls panels can improve thermal and sound insulation, enhancing comfort.
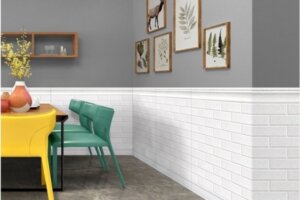
- Customization: Whether you prefer half wall panelling, shiplap panelling, or full wall paneling, the options are limitless.
Take inspiration from eco-friendly WPC wall panelling materials that mimic the look of wood panelling while being waterproof and low-maintenance—perfect for modern bedroom wall panelling or bathroom upgrades.
Why DIY Panelling On Walls?
DIY wall panelling saves money and lets you personalize your space. Imagine crafting a wood feature wall in your living room or a panelled room in your bedroom with your own hands. It’s an achievable project, even for beginners, with the right guidance. According to expert sources, panelling can be completed in a weekend with basic tools and materials—proof that easy panelling is within reach.
Popular Styles to Explore
- Shaker-Style Panelling: Simple, square panels for a clean, timeless look.
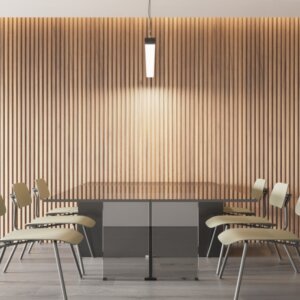
- Shiplap Panelling: Overlapping boards for a rustic vibe, great for wood walls.
- Beadboard: Vertical grooves for a cottage feel, often seen in hallway panelling.
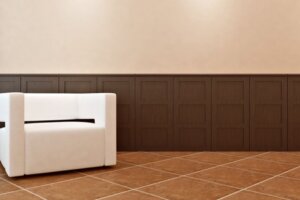
- Half Panelled Wall: Covers the lower wall, paired with paint or wallpaper above.
With wall panelling wooden options, you can blend sustainability and style. These products resist moisture and wear, making them ideal for interior wood wall panelling in any climate. Whether you’re paneling a wall in your bedroom or creating decorative panels for walls in your dining room, understanding the basics sets you up for success. Ready to get started? Let’s move to the planning phase!
Step 1: Planning Your DIY Wall Panelling Project
Before diving into your DIY wall panelling project, careful planning is essential. This step ensures your panel wall looks professional and fits your space perfectly. Here’s how to plan like a pro.
Measuring Your Space
Start by measuring the wall you want to panel. Use a tape measure to get the height and width, noting any windows, doors, or fixtures. For half paneling for walls, decide on the height—typically 1.2 meters (4 feet) for a classic look. Accurate measurements prevent material waste and ensure your wall panelling panels fit seamlessly.
Choosing a Style
Your style choice sets the tone for the room. Consider:
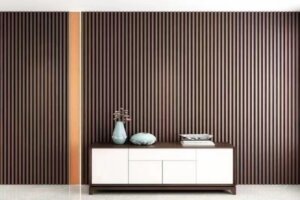
- Wood Panelling Ideas: Ideal for a cozy, natural feel in bedrooms or living rooms.
- MDF Panelling Wall: Budget-friendly and easy to paint, great for modern designs.
- Shiplap Panelling: Perfect for a rustic or farmhouse vibe.
- Square Panelling: Adds a geometric touch to contemporary spaces.
Think about the room’s purpose. For bedroom wall panelling, a calming wood panel wall might be best. In a hallway, durable wall panelling panels can withstand wear.
Gathering Tools and Materials
You’ll need:
- Panels: Choose from wood panels for walls, MDF, or WPC.
- Adhesive or Nails: Wall panel glue for a clean look or nails for extra security.
- Saw: For cutting panels to size.
- Spirit Level: To ensure straight lines.
- Measuring Tape and Pencil: For marking cuts and layout.
Consider pre-cut wall panelling kits for simplicity, or source individual wooden panels for walls for a custom touch.
Setting a Budget
Wall panelling can be affordable or luxurious, depending on materials. MDF is the cheapest wall panel option, while solid wood panelling costs more. Factor in tools, adhesive, and paint. For a cost-effective project, look for DIY panelling wall tutorials that emphasize budget-friendly tips.
Visualizing the Outcome
Sketch your design or use online tools to visualize the panelled wall. This helps you decide on panel spacing, especially for decorative wall wood panels or half wall panels. Remember, the goal is to enhance your space’s character, whether it’s a panelled bedroom wall or a dining room wall paneling feature.
With your plan set, you’re ready to prepare the wall for installation. Up next: prepping for a flawless finish.
Step 2: Preparing Your Wall for Panelling
With your plan in place, it’s time to prepare your wall for the DIY wall panelling project. Proper preparation ensures your wall panelling panels adhere securely and look flawless once installed. Whether you’re working with wood panelling for walls, MDF panelling wall sheets, or decorative wall wood panels, this step sets the foundation for success. Let’s walk through the process.
Assessing Your Wall’s Condition
Start by inspecting the wall you’ll be panelling. Look for imperfections like cracks, holes, or uneven surfaces that could affect the installation of your panelled wall. For bedroom wood panelling or hallway wall panelling, a smooth base is key to achieving a professional finish.
- Cracks or Holes: Fill these with wall filler or putty. Let it dry completely, then sand it smooth with fine-grit sandpaper.
- Uneven Surfaces: If the wall has bumps or dips, use a spirit level to identify problem areas. Sand down high spots or apply a thin layer of filler to low spots.
- Moisture Check: Ensure the wall is dry and free of dampness, especially for wood panelling ideas. Moisture can warp panels over time.
Cleaning the Wall
A clean surface is critical for adhesion, whether you’re using wall panel glue or nails. Dust, grease, or dirt can weaken the bond between the wall and your panelling.
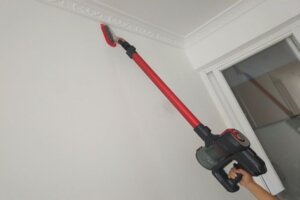
- Wipe the wall with a damp cloth to remove dust and debris.
- For greasy spots (common in kitchens or high-traffic areas), use a mild detergent solution, then rinse and dry thoroughly.
- Let the wall air out to ensure it’s completely dry before proceeding.
Removing Obstacles
Clear the wall of any fixtures that might interfere with your DIY panelling on walls. This includes:
- Light Switches and Outlets: Unscrew and gently pull these away from the wall. You’ll cut panels to fit around them later.
- Baseboards or Trim: Remove these with a pry bar if you’re doing full wall panelling. For half panelled walls, you might leave them in place and panel above them.
- Wallpaper or Old Paint: Strip peeling wallpaper or flaking paint. If the wall is painted and in good condition, you can panel over it after cleaning.
Priming (Optional)
For some projects, like MDF panelling wall installations, priming the wall can improve adhesion and protect against moisture. Use a primer suited for your wall type (e.g., drywall or plaster). This step is especially useful in humid areas or if you’re painting your panel wall later.
Marking Your Layout
Before installing, mark guidelines on the wall to ensure your wall panelling panels align perfectly. Use a pencil, measuring tape, and spirit level:
- For square panelling or vertical wood walls, draw lines where each panel or board will sit.
- For half wall panelling, mark the height line (e.g., 1.2 meters) across the wall.
- Double-check measurements from your plan to avoid mistakes.
Gathering Your Workspace
Set up a clean, organized area near the wall. Lay out your tools—saw, adhesive, nails, sandpaper—and keep your wood panelling for interior walls or other materials within reach. A clutter-free workspace makes the next steps smoother.
By thoroughly preparing your wall, you’ll ensure your bedroom panelling, hallway panelling, or any other design comes together seamlessly. Up next, we’ll dive into selecting and cutting your materials for a perfect fit.
Step 3: Selecting the Best Wall Panelling Materials
Choosing the right materials for your wall panelling is crucial for achieving the look and durability you desire. From classic wood panelling to modern MDF or WPC options, each material offers unique benefits. Let’s explore the best choices for your DIY panelling project.
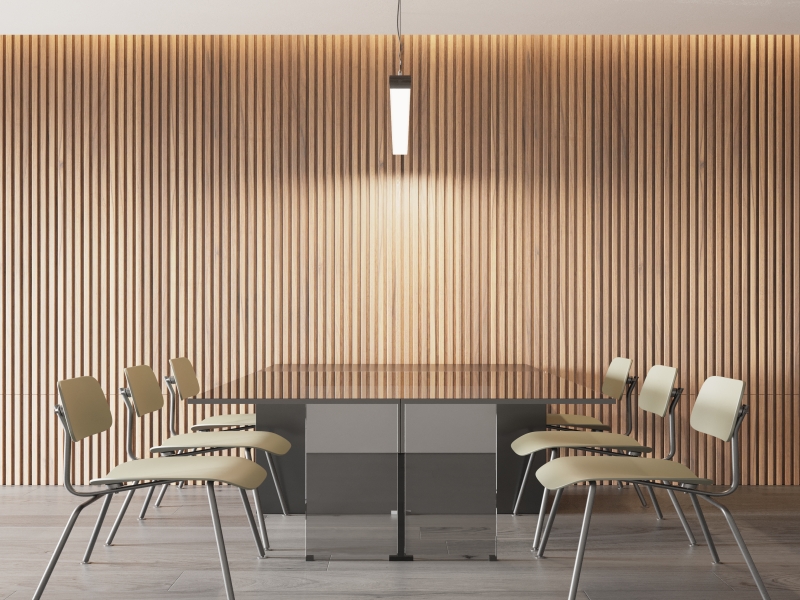
Wood Panelling: Timeless and Natural
Wood panelling for walls brings warmth and authenticity to any room. It’s perfect for creating a wood feature wall in living rooms or bedroom wood panelling for a cozy retreat.
- Pros: Rich texture, natural beauty, and excellent insulation.
- Cons: Can be expensive, prone to warping in humid conditions, and requires maintenance.
- Best For: Bedrooms, living rooms, or dining room wall paneling where aesthetics are key.
Look for sustainably sourced wood to align with eco-friendly wall panelling ideas.
MDF Panelling: Budget-Friendly and Versatile
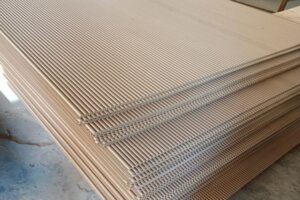
MDF (medium-density fiberboard) is a popular choice for DIY wall panelling due to its affordability and ease of use.
- Pros: Smooth surface for painting, lightweight, and resistant to warping.
- Cons: Not waterproof, so avoid in bathrooms or kitchens without proper sealing.
- Best For: Hallway wall panelling, bedroom wall panelling, or any dry area.
MDF panelling wall sheets are easy to cut and install, making them ideal for beginners.
WPC (Wood-Plastic Composite): Durable and Low-Maintenance
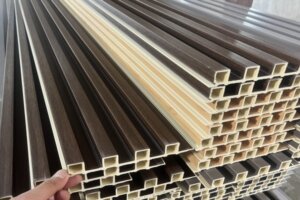
WPC is a modern alternative that combines wood fibers with recycled plastics, offering the look of wood with enhanced durability.
- Pros: Waterproof, termite-resistant, and requires minimal upkeep.
- Cons: Can be pricier than MDF but offers long-term savings.
- Best For: Bathrooms, kitchens, or exterior wall panelling.
WPC is also eco-friendly, making it a top choice for sustainable decorative wall wood panels.
Other Options to Consider
- Shiplap Panelling: Overlapping boards for a rustic look, great for wood walls.
- Beadboard: Vertical grooves for a cottage feel, often used in hallway panelling.
- Tongue and Groove: Interlocking panels for a seamless finish, available in wood or MDF.
When selecting materials, consider your room’s humidity, traffic, and style. For example, wood panelling for interior walls works well in dry areas, while WPC is better for damp spaces. Budget-wise, MDF is the cheapest wall panel option, but investing in quality materials can elevate your panel wall design.
With your materials chosen, it’s time to cut and fit your panels for a perfect installation. Let’s move on to the next step.
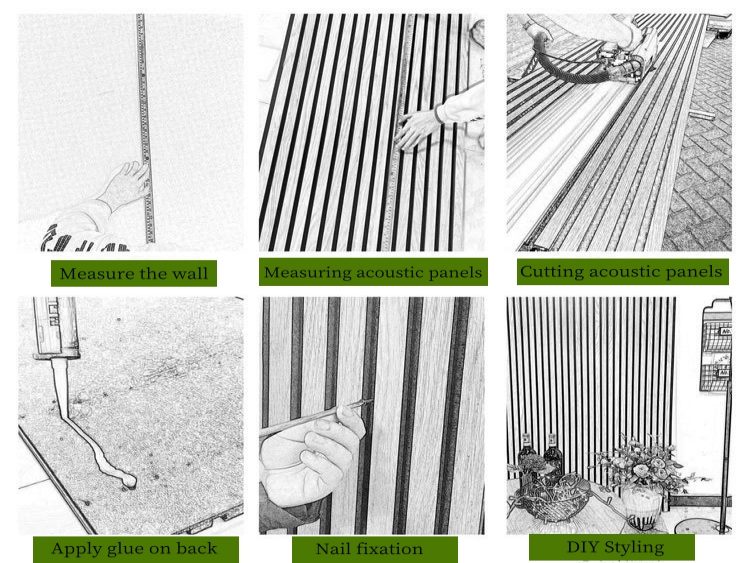
Step 4: Cutting and Fitting Your Panels for Walls
Now that you’ve selected your wall panelling materials, it’s time to cut and fit them to your wall. Precision is key to achieving a professional-looking panelled wall, whether you’re working with wood panels for walls or MDF panelling wall sheets. Here’s how to do it right.
Measuring for Accuracy
Before cutting, double-check your measurements. Measure the height and width of the wall, accounting for any windows, doors, or outlets. For half wall panelling, measure from the floor to your desired height.
- Tip: Measure twice, cut once. This old adage saves time and materials.
Marking Your Panels
Lay your wall panelling panels on a flat surface. Use a pencil and straightedge to mark where you’ll cut. For square panelling or decorative wall wood panels, ensure each piece is uniform.
- For Vertical Panels: Mark the length needed for each board.
- For Horizontal Panels: Measure and mark the width, ensuring they align with your layout lines.
Cutting Techniques
Use a saw suited to your material:
- Wood Panelling: A circular saw or handsaw works well.
- MDF Panelling: A jigsaw or fine-tooth saw prevents splintering.
- WPC: A carbide-tipped blade is best for clean cuts.
Wear safety goggles and work in a ventilated area. Cut slowly and steadily, following your marked lines.
Dry Fitting Your Panels
Before attaching, do a dry fit to ensure everything lines up. Place your cut panels against the wall, checking for gaps or misalignments.
- For Tongue and Groove: Ensure the grooves interlock smoothly.
- For Shiplap Panelling: Overlap the boards as per design.
Adjust any pieces that don’t fit perfectly. This step is crucial for a seamless panel wall installation.
Cutting Around Obstacles
For light switches or outlets, measure their position and mark the panel accordingly. Use a jigsaw to cut out the necessary shapes, ensuring a snug fit.
With your panels cut and fitted, you’re ready to install. Up next: securing your wall panelling panels like a pro.
Step 5: Installing Wall Panelling Panels Like a Pro
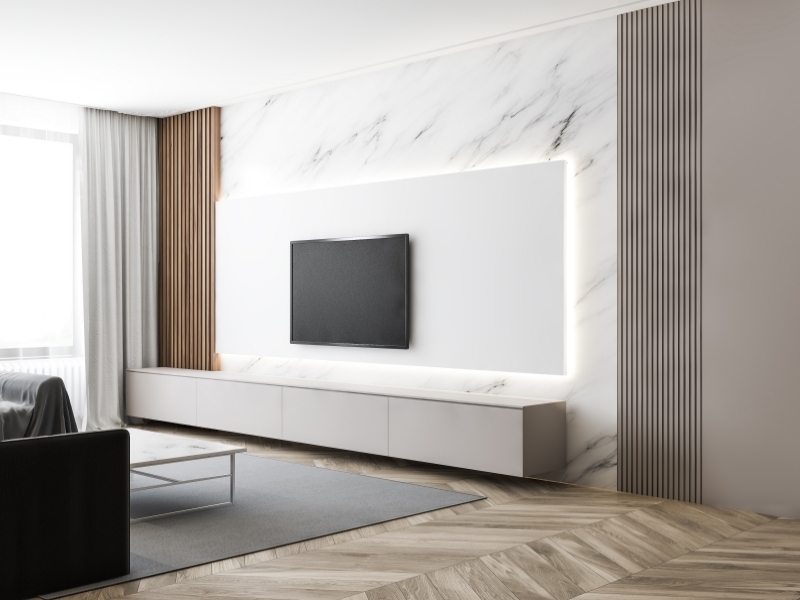
Installation is where your DIY wall panelling project comes to life. Whether you’re creating a wood panel wall in your bedroom or a modern panelled wall in your hallway, following these steps ensures a secure and stunning result.
Choosing Your Installation Method
You can attach wall panelling panels with adhesive, nails, or a combination of both.
- Adhesive: Ideal for a clean, nail-free look. Use a strong wall panel glue designed for your material.
- Nails: Provides extra security, especially for heavier wood panelling for walls. Use a nail gun for efficiency.
- Combination: Apply adhesive, then reinforce with nails for maximum hold.
For half wall panels or full panel wood wall designs, adhesive alone often suffices, but nails add peace of mind.
Applying Adhesive
If using glue:
- Apply a generous zigzag pattern of adhesive to the back of each panel.
- Press the panel firmly onto the wall, starting from the bottom for half paneling walls or from one corner for full walls.
- Use a spirit level to ensure each piece is straight.
Nailing Your Panels
For nailing:
- Position the panel, then drive nails into the studs or use a nail gun for speed.
- Space nails every 15-20 cm (6-8 inches) along the edges and in the center.
- For tongue and groove panelling, nail through the tongue to hide the nails.
Installing Around Obstacles
When you reach light switches or outlets, carefully fit the pre-cut panels around them. Secure with adhesive or nails as needed.
Ensuring Alignment
As you work, frequently check with a spirit level to keep your wall panelling panels straight. Adjust as necessary before the adhesive sets.
Finishing the Edges
For a polished look, add trim or molding to the top of half wall panelling or around the edges of full wall paneling. This hides any gaps and enhances the design.
With your panels installed, it’s time for the finishing touches. Let’s move on to perfecting your panelled wall.
Step 6: Finishing Touches for a Stunning Panelled Wall
Your wall panelling is installed—now it’s time to make it shine. The finishing touches transform your DIY panelling on walls into a professional-grade feature. Here’s how to perfect your wood panelling walls or MDF panel wall.
Filling Gaps and Seams
Even with precise cutting, small gaps may appear between panels or at the edges.
- For Wood Panelling: Use wood filler that matches your panel’s color.
- For MDF or WPC: Apply caulk or filler, then sand smooth once dry.
Pay special attention to corners and where panels meet trim or baseboards.
Sanding for Smoothness
Lightly sand the entire surface with fine-grit sandpaper to remove any rough spots or excess filler. This step is crucial for painted wall panelling paneling but also benefits stained wood walls.
Priming and Painting
If you’re painting your panelled wall:
- Apply a primer to seal the panels and ensure even paint coverage.
- Once dry, paint with your chosen color. For a modern look, consider matte or satin finishes; for traditional spaces, glossy paint adds elegance.
For wood panelling ideas, staining enhances the natural grain. Apply stain with a brush, then wipe off excess for an even finish.
Sealing for Protection
In high-moisture areas like bathrooms, seal your wall panelling wooden surfaces with a clear varnish or polyurethane to prevent water damage.
Adding Decorative Elements
Enhance your panel wall with:
- Picture Rails: For hanging art without damaging the panels.
- Shelves: Floating shelves complement wood feature walls.
- Lighting: Sconces or LED strips highlight the texture of decorative wall wood panels.
With these finishing touches, your bedroom panelling or dining room wall panels will look polished and complete. Now, let’s ensure your work lasts with proper maintenance.
Step 7: Maintaining Your Wood Panelling for Longevity
Proper maintenance keeps your wall panelling looking fresh and extends its lifespan. Whether you’ve installed wood panelling for interior walls or MDF panelling wall sheets, these tips will help preserve your investment.
Regular Cleaning
Dust and dirt can dull your panelled wall over time.
- Wood Panelling: Wipe with a soft, damp cloth. Avoid harsh chemicals that can strip the finish.
- MDF or Painted Panels: Use a mild detergent solution for stubborn spots, then dry thoroughly.
- WPC: Simply wipe with water; it’s resistant to stains and mold.
For bedroom wood panelling or hallway wall panelling, clean every few months to maintain its luster.
Preventing Damage
Protect your wall panelling from everyday wear:
- Furniture Placement: Use felt pads under furniture legs to prevent scratches.
- Humidity Control: In humid areas, use a dehumidifier to prevent warping in wood walls.
- Sunlight Protection: Install blinds or curtains to shield panels from UV damage, which can fade colors.
Refreshing the Finish
Over time, your wall panelling may need a touch-up.
- For Painted Panels: Repaint every 5-7 years or when chips appear.
- For Stained Wood: Reapply stain or varnish every few years to maintain the protective layer.
For decorative paneling in high-traffic areas like hallways, consider a durable topcoat for extra resilience.
Repairing Minor Issues
Address small problems promptly to avoid bigger repairs:
- Scratches: Use touch-up pens or filler for minor blemishes.
- Loose Panels: Re-secure with adhesive or nails as needed.
With regular care, your wall panelling bedroom or living room wood panelling will remain a stunning feature for years. Now, let’s style your space to showcase your new panels.
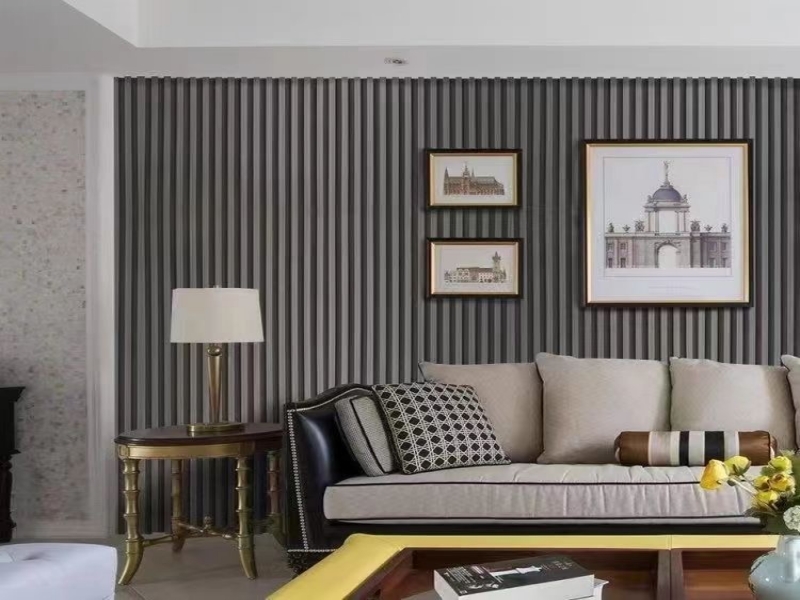
Step 8: Styling Your New Wall Panelling Bedroom or Hallway
Your DIY wall panelling is complete—now it’s time to style the room to highlight your handiwork. Whether you’ve created a wood panel wall in your bedroom or a modern panelled wall in your hallway, thoughtful styling enhances the overall effect.

Furniture Placement
Arrange furniture to complement your wall panelling:
- Bedroom: Position the bed against the panelled wall for a cozy focal point. Add a plush headboard to contrast with the wood panelling bedroom design.
- Living Room: Place a sofa or console table in front of the panel wall to draw attention to the texture.
- Hallway: Keep furniture minimal to let the wall panels hallway shine. A slim bench or coat rack works well.
Adding Decor
Enhance your wall panelling with decor that suits your style:
- Art and Mirrors: Hang framed art or mirrors to break up large expanses of panelling. For half wall panelling, place artwork above the panels.
- Shelving: Install floating shelves on your wood feature wall to display books or plants.
- Textiles: In a bedroom, layer bedding and curtains that complement the wall panelling color.
Lighting Ideas
Lighting can accentuate the texture of your decorative wall wood panels.
- Sconces: Mount wall sconces on either side of the bed or along a hallway for a warm glow.
- LED Strips: Install behind panels for a modern, backlit effect.
- Floor Lamps: Use in corners to cast light upward, highlighting the wall panel design.
With these styling tips, your wall panelling will truly transform your space. Congratulations on completing your DIY project!
FAQ Tips: Your Wall Panelling Questions Answered
- What’s the cheapest wall panel option for DIY panelling wall?
MDF panelling wall is the most budget-friendly, offering a smooth surface for painting and easy installation. - How long does it take to create a panel wall in a bedroom?
Most bedroom wall panelling projects can be completed in a weekend with basic tools and preparation. - Can I use wall panelling wooden materials in bathrooms?
Yes, but choose moisture-resistant options like WPC or sealed wood panelling for interior walls. - Is panelling a room difficult for beginners?
No, with step-by-step guides like this, even beginners can achieve professional results. - What’s the best finish for wood panelling for living room walls?
Paint for a modern look or stain to highlight the natural wood grain—choose based on your decor style.
This complete article provides a detailed, engaging guide to DIY wall panelling, blending practical advice with creative inspiration. Enjoy your panelling project!